
Thursday, November 8, 2012
Halloween on the Simple Man Cruise 2012
My boyfriend's band, Son of a Bad Man, was one of the acts on this year's Simple Man Cruise. It was such an amazing experience - one that will never be forgotten. The last night of the cruise, October 30th, was a Halloween celebration. This photo was taken of Shawn & me in our ventriloquist/ventriloquist doll costumes by Will Byington.

Monday, November 5, 2012
Food Porn
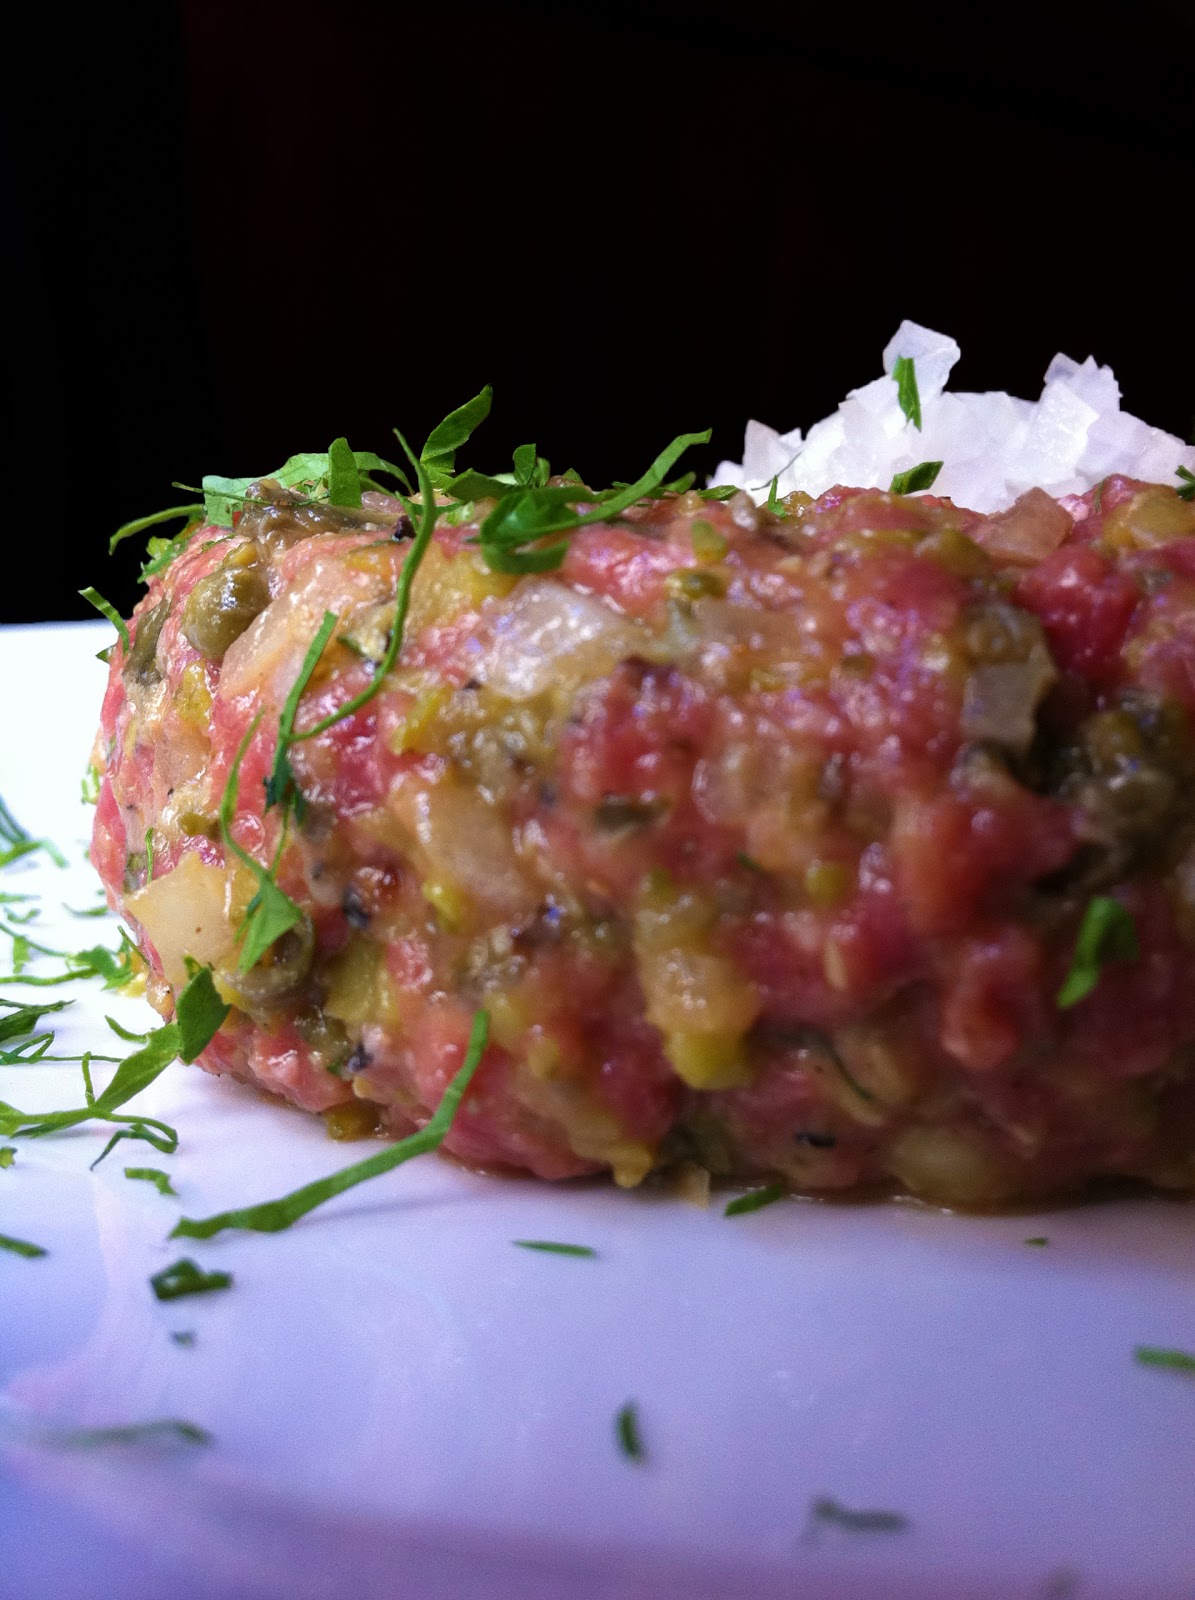
I haven't posted in awhile because I've been out of the country on the Simple Man Cruise with my boyfriend Shawn & his band, Son of a Bad Man. It was a BLAST. Shawn & I stayed in South Beach for Halloween, so, very soon, I will be back into the swing of things. I figured I'd post a beautiful photo that I took (with my iPhone 4) at Les Halles (Anthony Bourdain's restaurant in NYC) of beef tartare. I recently printed this on a large canvas for my kitchen. Enjoy. ;)

Tuesday, October 23, 2012
Oven-Fried Chicken {Gluten-Free}
Serves 4


My parents have been reading the book Wheat Belly and have been cutting back on the amount of wheat/gluten they consume. I'm still in the early stages of researching this way of eating, and since it makes sense that this could be a healthier lifestyle, I've been trying to come up with delicious gluten-free substitutes for the everyday cravings we wheat-lovers want.

My dear friend, Frederiche Gray, who has been my hairstylist for years now, is moving to Oregon today. My family had Frederiche & his husband over for a sending-off dinner last night, and I decided to make a tried-and-true delicious recipe that I've posted on this blog before, but I made a couple changes to make it gluten-free!
Cree LaFavour's recipe from Poulet: More Than 50 Remarkable Recipes That Exalt the Honest Chicken, Oven-Fried Chicken, is one of my all-time favorite dishes to make. It's crispy, juicy, and so much healthier than fried chicken (I actually think it's BETTER)! I researched how to make a gluten-free all-purpose flour, and found this wonderful blog called Gluten-Free Girl and The Chef. The blog explained which flours could be used and what the correct proportions are to make a gluten-free all-purpose flour (see the post here). I decided to use oat flour as my whole grain flour, and potato flour as my starch. My family, who has eaten this recipe before, liked the gluten-free version even more! It was so crispy, and seriously delicious!


Ingredients:
- 1/4 cup organic whole milk
- 1/4 cup olive oil
- Juice of 2 lemons
- 1 tsp. Kosher salt, plus 1 tbsp.
- 8-10 bone-in, skin-on chicken thighs (or 4 bone-in, skin-on chicken breasts)
- 3 oz. oat flour
- 5 oz. potato flour
- 1/2 tsp. cayenne pepper
- Black pepper
- Flaky salt for finishing
- 1/4 cup coursely chopped fresh chives or parsley
Directions:
In a large bowl, stir together the milk, olive oil, lemon juice and the 1 tsp. Kosher salt. Add the chicken to the bowl and turn to coat on both sides. Marinate at room temperature for at least 30 minutes and up to 1 hour, or cover and refrigerate up to 24 hours. If refrigerating, return the chicken to room temperature for 30 minutes or so to take the chill off before cooking.
Preheat the oven to 400° F.
Stir together the oat flour, potato flour, 1 tbsp. Kosher salt, and cayenne in another large bowl. Season with the black pepper. Lift the chicken pieces from the marinade and dredge in the seasoned flour to coat on both sides. Give each piece a little shake to remove any excess flour. Lay the pieces on a parchment paper-lined or lightly greased baking sheet, skin-side down.
Bake the chicken for 30-40 minutes, turning after 15 minutes, or until the crust is a deep, golden brown. I covered my chicken with aluminum foil at the end because the crust was very crispy, and I didn't want it to burn. Either insert an instant-read thermometer into the thickest part of a thigh or cut into a thigh with a paring knife. The thermometer should register 175° F. If using a knife, look for clear, not red or pink, juices running from the spot where you pierced the meat and opaque, barely pink flesh at the bone. If the chicken isn't done, bake for 5 to 10 minutes longer and check it again.
When the chicken is done, remove it from the oven, sprinkle with a little flaky salt, and let rest for 5 minutes. Arrange on a platter or divide among individual plates. Scatter the chives or parsley on top and serve.
Wednesday, October 17, 2012
Spicy BBQ Baby Back Ribs
Serves 4-6

My mom found some delicious-looking organic baby back pork ribs yesterday at Native Sun in Jacksonville, FL, for me to make for a family dinner. I'd never cooked ribs before, so I researched some different cooking methods. I found a wonderful recipe on AllRecipes.com (link to original recipe below) that had rave reviews. I altered the sauce and cooking method, and got very lucky! The sauce turned out incredible (I will use it for different BBQ meats in the future), and the meat was literally falling off the bone. The garlic is a nice touch, and I'm going to double it next time! I cannot wait to make these yummy ribs again. :)


Ingredients:
Preheat oven to 350 degrees F (175 degrees C). Place ribs in two 10x15 inch roasting pans. Pour water and apple cider vinegar into a bowl, and stir. Sprinkle some freshly cracked black pepper over the ribs. Add the garlic and bay leaves to each of the pans. Pour diluted vinegar over ribs, and cover with foil. Bake in the preheated oven for 25 minutes. Baste the ribs with their juices. Reduce heat to 300 degrees F. Bake for 35 minutes more.


Lightly oil preheated grill. Grill ribs (with garlic) over medium heat for 10 minutes, turning ribs once. Baste ribs generously with barbeque sauce, and grill 2 minutes. Turn ribs, baste again with barbeque sauce, and grill 2 minutes.

Ribs:
Directions:
- 4 pounds baby back pork ribs
- 2/3 cup water
- 1/3 cup Bragg apple cider vinegar
- 6 large garlic cloves, barely chopped
- 2 bay leaves
- Freshly ground black pepper
Barbeque Sauce:
- 1/2 cup Melinda's Jalapeño ketchup
- 1/2 cup ketchup
- 1 cup water
- 1/2 cup Bragg apple cider vinegar
- 1/3 cup Worcestershire sauce
- 1/4 cup organic creamy yellow mustard
- 4 tablespoons butter
- 2/3 cup packed brown sugar
- 1 teaspoon Sriracha pepper sauce
- 1/8 teaspoon sea salt
Preheat oven to 350 degrees F (175 degrees C). Place ribs in two 10x15 inch roasting pans. Pour water and apple cider vinegar into a bowl, and stir. Sprinkle some freshly cracked black pepper over the ribs. Add the garlic and bay leaves to each of the pans. Pour diluted vinegar over ribs, and cover with foil. Bake in the preheated oven for 25 minutes. Baste the ribs with their juices. Reduce heat to 300 degrees F. Bake for 35 minutes more.


In a medium saucepan, mix together jalepeño ketchup, ketchup, water, Bragg apple cider vinegar, Worcestershire sauce, mustard, butter, brown sugar, Sriracha pepper sauce, and sea salt; bring to a boil. Reduce heat to low, cover, and simmer barbeque sauce for 2 hours.

Place all ribs into one container, discarding cooking liquid and bay leaves, keeping garlic. Pour half of your BBQ sauce all over them. Cover and marinate for at least 2 hrs in the refrigerator. (I marinated for 3 hrs.) Take the ribs out of the refrigerator about 30 minutes before you're ready to cook them to let them get to room temperature.

Preheat grill for medium heat.
Lightly oil preheated grill. Grill ribs (with garlic) over medium heat for 10 minutes, turning ribs once. Baste ribs generously with barbeque sauce, and grill 2 minutes. Turn ribs, baste again with barbeque sauce, and grill 2 minutes.

Place ribs on a serving platter, and let rest for 5 minutes. Serve with extra BBQ sauce on the side for dipping. Garnish with grilled garlic.
Recipe adapted from Allrecipes.com
Recipe adapted from Allrecipes.com
Tuesday, October 16, 2012
Flagship Romance CD Release Party!
I've been dying to announce this!!! ♥
I'm thrilled to say that my duo project with Shawn Fisher, Flagship Romance, is releasing our debut EP, "The Fudge Sessions," at Jack Rabbits in Jacksonville, FL, on January 19, 2013! SAVE THE DATE!! We have been working really hard, and we're so excited about this record. "The Fudge Sessions" was recorded this past July at Fudge Recording Studio in New Orleans, LA.
We have an amazing team around us, and without all of them, we couldn't be where we are today...
Jack Miele {producer, engineer, electric guitar, bass, percussion, & more} | Chris Arceneaux {drums} | Beau St. Pierre {piano, Rhodes, organ} | Ian Smith {trombone} | Chelsea Partington {engineer} | Lucio Rubino {string production} | Shawn Grove {mixing engineer} | Jeff Lipton & Maria Rice at Peerless Mastering | Tim Hall {manager} | Our parents
The above people have made this record become a reality, and we couldn't thank them enough!
Please mark your calendars - it's going to be a killer party!! And I would appreciate it SO much if you would spread the word to your friends & families.
xxoo, Jordyn


Sunday, October 14, 2012
Caramel Rum Pecan French Toast
Serves 4
Happy Sunday, everyone! This is a recipe I conjured up awhile ago, and just found it hidden on my computer. I wish I could've made this today - it's the perfect Sunday brunch (and I'm soooo hungry right now)!
Now, this is not a simple, nor easy recipe, but the final result is most definitely worth the time & effort. My family DIED over this French toast, and I'm sure yours will, too, if you decide to make it. It's crispy, sweet, buttery, and nutty! I'm making my own tummy growl.


Ingredients:
French Toast:
- 2 cans Pillsbury Simply French Bread
- 6 eggs
- 1/4-1/2 cup heavy cream
- 1/2 tsp vanilla
- 2 cups Ian's Plain Panko crumbs
- 1 cup brown sugar
- 1 cup very chopped pecans
- Pinch ground cinnamon
- Small pinch ground nutmeg
- Unsalted European butter
- Confectioner's sugar for dusting
Caramel Rum Sauce:
- 1/2 cup brown sugar
- 1/4 cup salted butter
- 1 tbsp corn syrup
- Splash Mount Gay rum
Strawberry Compote:
- 2 cups chopped fresh strawberries
- 1 tbsp water
- 1/4 tsp Confectioner's sugar
Directions:
Bake French bread as directed, set aside.
Put strawberries, water, and confectioner's sugar in a small saucepan. Cook on medium high heat, covered, for a few minutes till juices come out. Uncover & let simmer, stirring occasionally till thick. Leave on low heat till ready to use.
Put caramel sauce ingredients in small saucepan, but wait to heat until French toast is almost finished.
Make egg wash: Crack 6 eggs into large shallow bowl. Add heavy cream & vanilla, mix well.
In another large shallow bowl, mix together Panko crumbs, brown sugar, pecans, cinnamon, & nutmeg.
Heat electric griddle to 375 degrees, or heat large pan on stove on medium high heat.
Cut French bread in 1.5 inch diagonal slices. Soak pieces in egg wash. Add large pat of unsalted butter to skillet. Dip both sides of soaked bread pieces into the pecan coating, then add to skillet. Fry for 2-3 minutes on each side, till browned & crispy.
Turn caramel saucepan on medium high heat. Stir constantly until ingredients are melted together well.
Dust French bread with confectioner's sugar. Serve compote & caramel rum sauce in separate bowls. Also, serve with good Maple syrup if wanted. Enjoy!
Friday, October 12, 2012
Soaking up Design Sponge at Home
I love, love, love the store Anthropologie. It inspires me so very much every time I walk inside... And I am seriously obsessed with their book collection. I saw Design Sponge at Home in Anthropologie, and was initially drawn to it because of the color (tangerine is my favorite interior accent color at the moment). I purchased it after flipping through, and realizing that it was more than just a pretty cover - but it is just as inspiring as the store it's sold in!
Design Sponge is a blog started by Brooklyn-based writer Grace Bonney. She compiled her favorite homes and DIY projects, and put them into this very well-designed, gorgeous hard-back book.
I'm so excited to begin a Do-It-Yourself project that is featured in Design Sponge at Home. I'll take some photos of the final product and post them here. You can find some fun DIY projects on the Design Sponge blog.
I highly recommend this book to anyone in love with interior design or DIY! You can purchase the book at Anthropologie, Amazon (it's a lot cheaper there), and more.


Thursday, October 11, 2012
Thai Beef Salad (Yum Nuea)
Serves 4-5
My family has been frequenting a certain local Jacksonville Thai restaurant for about 17 years now. Pattaya Thai Grille was once owned and operated by our friend Lek, who's son, Russell, now owns and it and is the main chef.
Shawn & I were invited to a dinner with new friends recently where we were to bring a dish made with flank steak, and then all of the dishes were to be voted on. I told Lek about this food contest, and she verbally gave me the recipe for her version of Thai Beef Salad (Yum Nuea). I put my own style into it, and it was quite a hit at the dinner!
The measurements below are guesstimates, since I make this by taste. If you like your food very spicy, add another chili pepper... If you're not into spice, SHAME ON YOU! Just kidding. ;) Just use 1 chili pepper. If you cannot find thin soy, use Tamari or regular soy sauce, but taste the mixture before pouring it all over your steak. You may want to add a little more lime juice.

Directions:
Take your steaks out of the refrigerator to let them warm to room temperature (about 20 minutes). Turn your grill on (I have an electric grill since I live in a condo & am not allowed to have gas or charcoal). Let it get to high heat (about 15 minutes).
Prep your onion, green onion, cilantro, tomatoes and set aside.
In a food processor or blender, finely chop the garlic and chili pepper. Set the mixture aside.
Grill the flank steaks for about 5 minutes on each side, or until they're done to your liking. Let the cooked steaks rest on the counter.
Arrange sliced tomatoes on your nicest platter or large plate. In a bowl, mix together the garlic/chili pepper, lime juice, thin soy, and sugar. This is your sauce... and wow, it's good.
Cut flank steaks into quarter-inch slices - cut against the grain, or your meat will be chewy. Cut the slices in half, and then arrange half of the meat on the serving platter. Stack your meat high to make it look like there's a lot of it. Arrange half of the sliced onions on top of the meat. Pour half of the sauce over the meat & onions. Generously sprinkle some of the fresh cilantro on top. Repeat with the rest of the meat, then the onion, the rest of the sauce, more cilantro, and then top with the sliced green onion and fresh mint.
Serve with jasmine rice, and make sure to spoon that delicious sauce over the rice. Bon appetit!
My family has been frequenting a certain local Jacksonville Thai restaurant for about 17 years now. Pattaya Thai Grille was once owned and operated by our friend Lek, who's son, Russell, now owns and it and is the main chef.
Shawn & I were invited to a dinner with new friends recently where we were to bring a dish made with flank steak, and then all of the dishes were to be voted on. I told Lek about this food contest, and she verbally gave me the recipe for her version of Thai Beef Salad (Yum Nuea). I put my own style into it, and it was quite a hit at the dinner!
The measurements below are guesstimates, since I make this by taste. If you like your food very spicy, add another chili pepper... If you're not into spice, SHAME ON YOU! Just kidding. ;) Just use 1 chili pepper. If you cannot find thin soy, use Tamari or regular soy sauce, but taste the mixture before pouring it all over your steak. You may want to add a little more lime juice.


Ingredients:
- 2 lbs. flank steak
- 1 cup freshly squeezed lime juice
- 3 tbsp. thin soy sauce
- 1 tbsp. granulated sugar
- 4 cloves garlic
- 2 chili peppers
- 1 med. white onion, thinly sliced
- 1 green onion, sliced
- 3 cups fresh cilantro, chopped
- Fresh mint leaves, for garnish
- 3 medium tomatoes, sliced for garnish
- Jasmine rice
Directions:
Take your steaks out of the refrigerator to let them warm to room temperature (about 20 minutes). Turn your grill on (I have an electric grill since I live in a condo & am not allowed to have gas or charcoal). Let it get to high heat (about 15 minutes).
Prep your onion, green onion, cilantro, tomatoes and set aside.
In a food processor or blender, finely chop the garlic and chili pepper. Set the mixture aside.
Grill the flank steaks for about 5 minutes on each side, or until they're done to your liking. Let the cooked steaks rest on the counter.
Arrange sliced tomatoes on your nicest platter or large plate. In a bowl, mix together the garlic/chili pepper, lime juice, thin soy, and sugar. This is your sauce... and wow, it's good.
Cut flank steaks into quarter-inch slices - cut against the grain, or your meat will be chewy. Cut the slices in half, and then arrange half of the meat on the serving platter. Stack your meat high to make it look like there's a lot of it. Arrange half of the sliced onions on top of the meat. Pour half of the sauce over the meat & onions. Generously sprinkle some of the fresh cilantro on top. Repeat with the rest of the meat, then the onion, the rest of the sauce, more cilantro, and then top with the sliced green onion and fresh mint.
Serve with jasmine rice, and make sure to spoon that delicious sauce over the rice. Bon appetit!
Tuesday, September 4, 2012
Orecchiette with Browned Butter and Snails
Serves 2-4 (I suggest doubling if you have 4 people with big appetites!)

Last week, my family and I went to North Carolina to unplug for a few days. We stopped by Dean and Deluca (an amazing specialty grocery store), where I picked up a can of gourmet French Wild Burgundy Snails. I also found some delicious looking orecchiette pasta, which seemed like the perfect pairing for the snails.
While in the mountains of North Carolina, I visited the Ashe County cheese shop and picked up some Ashe County butter, which I used in this recipe. On the last day of our vacation, we went to the West Jefferson, NC, farmer’s market - incredible! A very nice couple, Ron and Suzanne Joyner, of Big Horse Creek Farm, were set up at the farmer’s market. They specialize in Antique and Heirloom Apple Trees, but at the market, they had a booth for their fresh produce, and they had 4 different types of garlic. I bought a few bulbs of each kind, and couldn’t wait to get home to Florida to try them all! From other vendors, I also purchased some beautiful heirloom tomatoes, hot peppers, and a few other goodies.
This past weekend was the perfect weekend to experiment in my new kitchen. The day after we returned back to Florida, I spent the entire morning/afternoon chopping, tasting, and experimenting with a bunch of fresh ingredients gathered from our mountain getaway. I made habanero salsa and two different kinds of bruschetta with the juicy, flavorful heirloom tomatoes, but my favorite dish of the weekend was this pasta. Hope you enjoy!


Ingredients:
- 8.8 oz. Orecchiette pasta (or about 1/2 lb.)
- 7.5 oz. can of Wild Burgundy Snails (4 dozen small)
- 4 tbsp. butter
- 1/4 tsp. Herbs de Provence, ground in mortar & pestle
- 1 clove garlic, minced (I used Persian Star garlic from Big Horse Creek Farm)
- 1 tbsp. grated Parmesan cheese
- 1 tbsp. fresh parsley, chopped
Directions:
Cook orecchiette pasta as directed on package.
While pasta is boiling, heat butter in a saucepan over medium-high heat, stirring constantly, for 5 minutes, or until butter has a golden brown color. When butter has desired coloring, add garlic, Herbs de Provence, and snails. Stir to combine, and remove from heat.
Strain pasta out of boiling water when finished, and add directly to the browned butter saucepan. Immediately add Parmesan cheese and parsley, and stir to combine all ingredients.
Serve in your prettiest bowls, and serve with fresh French bread if desired.
Monday, July 9, 2012
Garlicky Spaghetti Squash
Serves 4-6

Spaghetti Squash is an amazing veggie. It blows me away every single time I have it. It’s so easy, so delicious, so healthy, and so cool! I love the way it comes apart with a fork, and with a little imagination, it tastes like pasta! There are two ways to go about cooking it, as I will explain below. This recipe is super simple & yummy, and I recommend using the “poking holes” method if you don’t own a REALLY sharp, serrated knife. Enjoy!


Ingredients:
- 1 spaghetti squash
- 2 tbsp. good olive oil
- 1-2 cloves garlic, minced
- Fresh basil leaves, shredded
- Kosher or sea salt
- Freshly cracked black pepper
Directions:
COOKING YOUR SPAGHETTI SQUASH:
Method 1 (Cooking time: 30-35 mins | you will need a VERY sharp, serrated knife):
1. Preheat oven to 375°F and halve squash lengthwise. Use a spoon to scoop out and discard seeds from the middle of each half.
2. Arrange squash in a 9˝ x 13˝ casserole dish, cut sides down. Pour 1/2 cup water into the dish and bake until just tender, 30 to 35 minutes.
3. Rake a fork back and forth across the squash to remove its flesh in strands… it looks just like spaghetti!
Method 2 (Cooking time: 1 hour):
1. Preheat the oven to 375°F. Prick the spaghetti squash all over with a skewer so it will not burst while baking.
2. Place the whole squash in a shallow baking pan and bake for 1 hour.
3. When cool enough to handle, cut the spaghetti squash in half, lengthwise, with a serrated knife.
4. Use a spoon to scoop out and discard seeds from the middle of each half.
5. Rake a fork back and forth across the squash to remove its flesh in strands.
SEASONING YOUR SPAGHETTI SQUASH:
Place spaghetti squash strands in a serving bowl. Add the 2 tbsp. of olive oil & minced garlic, and toss well. Season to taste with salt & pepper. Garnish with fresh basil shreds. Delicious!
Monday, June 18, 2012
My Dad's {So Delicious} Blackening Spice
This is my dad's TOP SECRET (not anymore!) blackening spice recipe. I made some delicious blackened chicken breasts with it the other night, so he told me that I could go ahead and post the recipe on my blog. :) He makes this in large quantities, and then stores it in the pantry in "Fish/White Meat Blend" & "Red Meat Blend" labeled containers so that we can use it all year. It is so, so, so good.
Fish/White Meat Blend:
- 4 parts paprika
- 2 parts white pepper
- 2 parts red pepper
- 2 parts black pepper, coarse
- 2 parts thyme
- 2 parts salt
- 2 parts sugar
- 2 parts oregano
- 2 parts onion powder
- 2 parts garlic powder
- 1 part rosemary
For Red Meat, also add:
- 1 part cumin
- 1 part fennel seed
- 2 parts Coleman's mustard powder
Bombastic Blackened Chicken
Serves 4


Once you have made my dad's amazing blackening spice, and have it stored in your pantry for future use (see the recipe here), this dish is one of the easiest & quickest meals to throw together on a whim! It's spicy, juicy, and so flavorful.. so much so that I actually said "bombastic." ;) Pair with a salad or some southern greens, like I did!


Ingredients:
- 4-5 boneless, skinless chicken breasts
- 2-3 tbsp. butter
- My dad's blackening spice (see here)

Directions:
Preheat oven to 350º. Wash chicken breasts, pat dry. Pour a generous amount of blackening spice into a shallow bowl. Place chicken breasts, one by one, into the blackening spice, and coat very generously with the spice. Place coated chicken breasts into a baking dish. Put 1/2 tbsp. butter on top of each breast. Bake for 15 minutes on each side. Voila!
Wednesday, June 6, 2012
Panko Pecan Pan-Fried Flounder
I LOVE breading fish and chicken with pecans. The final product is so crunchy, and has amazing flavor. I usually just make this on a whim, using whatever ingredients I have lying around (Italian style breadcrumbs work really well, too), but this time I decided to really give it my all so that I could share a recipe with you!


Ingredients:
For the marinade:- 4 fresh Flounder fillets
- 1/2 cup buttermilk
- Juice of 1 lemon
- 1/2 tsp. Kosher salt
- Freshly ground black pepper
- 2 eggs
- 1/2 cup flour
- 6 oz. chopped pecans
- 1 cup whole wheat Panko crumbs
- 2 tsp. Kosher salt
- 1/2 tsp. freshly cracked pepper
- 2 tbsp. peanut oil
Directions:
In a shallow baking dish, mix together the buttermilk, lemon juice, salt and pepper. Add the Flounder fillets, cover, and marinate in the refrigerator for an hour, taking out of the refrigerator 30 minutes before cooking them.
In a shallow dish, add the flour. Season with the salt and pepper.
In another shallow dish, crack the eggs, and whisk till creamy.
In a third shallow dish, mix together the pecans and Panko crumbs.
Heat 1 tbsp. oil in a large skillet over medium-high heat. Dredge 2 of the fish fillets in the flour, then shake off the excess. Dip into the egg, and then cover with the pecan/Panko mixture. Cook the two fillets for about 3 minutes on each side, or until the fish is white and flaky inside. Repeat with the other 2 fillets, adding the remaining tbsp. oil before cooking them.
Serve immediately, and garnish with fresh dill if desired.
Saturday, May 19, 2012
Cold Green Bean Salad with Goat Cheese Dressing
This is an easy & super fresh salad! I had a craving for green beans, and decided to get a little creative with a salad. I LOVE radishes - they're an obsession I've had since I was a little girl - so anytime I can incorporate them into a recipe, I do. This is a perfect summer pairing for a fish or chicken dish... I served it alongside my Panko Pecan Crusted Flounder.


Ingredients:
- 1.5 lbs. fresh green beans
- 10-15 red radishes, sliced
- 5 sweet Campari tomatoes, deseeded and diced
- 1 tbsp. olive oil
- 1 or 2 garlic cloves, minced (depending on your love for garlic)
- 1 tbsp. fresh lemon juice
- 2.5 oz. goat cheese
- 1 tbsp. fresh dill, chopped
- Kosher or sea salt & freshly cracked pepper, to taste
Directions:
Bring a large pot of water to a boil. Add the green beans and cook until they are a little tender and turn bright green, approx. 2 minutes. Drain. Submerge the green beans in a bowl of very cold water. Drain again and pat dry with a paper towel.
For the dressing: In a small bowl, whisk together the goat cheese, lemon juice, olive oil, garlic and dill. Salt & pepper to taste. Toss green beans with the dressing and transfer into your serving bowl. Garnish with fresh dill sprigs if you'd like. Enjoy!!
Friday, May 18, 2012
Grandma's Chocolate Sheath Cake
A good friend of mine asked me if I could suggest a dessert for him to make for a small dinner party next month. My mind immediately went to this recipe... My grandmother's chocolate sheath cake. This recipe was passed down to my mom, who makes it for most of our family's special occasions. I have to admit, I've actually never made it myself, but I've watched my mother make it countless times, and know that it's a simple & delicious cake!
Unfortunately I don't have a photo to add to this recipe, but now I'm itching to make this cake, so as soon as I do, I'll take a photo and add it to this post.
Ingredients:
{cake}:
- 2 cups flour
- 2 cups granulated sugar
- 1 stick butter
- 1/2 cup shortening
- 4 tbsp. cocoa powder
- 1 cup water
- 1 tsp. baking soda
- 1/2 cup buttermilk
- 2 tsp. ground cinnamon
- 1 tsp. vanilla extract
- 2 eggs
- Dash of salt
{icing}:
- 1 stick butter
- 4 tbsp. cocoa powder
- 6 tbsp. whole milk
- 1 tsp. vanilla extract
- 1 cup chopped pecans
- 1 lb. powdered sugar
Directions:
For the cake: In a large bowl, sift together the flour and sugar. Set aside. In a saucepan over medium heat, mix together butter, shortening, cocoa, and water. Bring to a boil, and then pour over dry ingredients, stirring well.
Add soda, buttermilk, cinnamon, vanilla, eggs, and salt. Mix and pour into a 17x11 sheet pan. Bake 20 minutes at 400 degrees.
For the icing {start 5 minutes before cake is finished baking}: In a saucepan, bring butter cocoa, milk, vanilla, and nuts to a boil. Remove from heat. Add powdered sugar and beat till creamy. Pour over hot cake. Serve warm with vanilla ice cream if desired.
Monday, April 23, 2012
Buffaloaf
Serves 4*

Okay, I'm not one to toot my own horn, BUT this has to be one of the best things I've ever eaten, let alone come up with. The photo does it no justice. If you've ever eaten bison/buffalo meat, you will appreciate this recipe by just reading the ingredients... if you haven't tried bison/buffalo meat yet, you are in for a treat. Bison is so much leaner than beef, AND tastes even yummier in my opinion. According to an article on Livestrong.com, "a 3 oz. serving of beef sirloin contains 12 grams of fat, while 3 oz. of bison sirloin contains just 5 grams. Beef sirloin is also higher in saturated fat, with 5 grams, compared to 2 grams of saturated fat in bison sirloin." Pretty impressive, huh? Ground bison can be found at your local Whole Foods Market (or other high end grocery), and even some basic grocery stores - just ask your butcher! I made Garlicky Spaghetti Squash on the side, and it was a perfect meal. I hope you enjoy this as much as I did!!
*Just a tip: you will probably want to double this so that you have left-overs!


Ingredients:
- 1.5 lbs. ground buffalo (bison)
- 15 oz. of Rao's Marinara Sauce (or your favorite marinara/spaghetti sauce)
- 2 eggs
- 1 cup whole wheat Panko crumbs
- 1/4 cup sweet onion, chopped
- 2 tbsp. fresh basil, chopped
- 1 can of chipotle peppers in adobo sauce - use 1 pepper, deseed and finely chop - about 1 tbsp.
- 8 oz. fresh mozzarella cheese (Buffalo mozzarella if you feel like spending the $!), cut into 1/4 inch slices
- 1 tsp. Kosher salt
- 1/4 tsp. freshly cracked black pepper
- 2 tbsp. grated parmesan cheese, for topping
Directions:
Preheat oven to 350. In a large bowl, combine the buffalo meat, half of the marinara sauce, eggs, Panko crumbs, chipotle pepper, onion, basil, salt, and black pepper. Mix well. Divide the mixture into thirds. Spread 1/3 in the bottom of an ungreased 9x5" loaf pan. Place half of the mozzarella slices on top. Repeat layers, and end with the meat. Bake for 30 minutes. Spread the rest of the sauce on the buffaloaf. Bake for an additional 20 minutes. Remove from oven, and add parmesan to top. Bake for 5 minutes more. Let sit for 5 minutes before serving. Enjoy!!
Subscribe to:
Posts (Atom)